IndiaExcel – Learn Microsoft Excel

Category: Microsoft Excel Buttons
  • Fill buttons description of Editing group MS Excel 2016

    Fill buttons overview Editing group Excel

    Fill buttons Editing group Home tab MS Excel
    Fill buttons description Microsoft Excel 2016

    See Previous Post: Multiple ways use Autosum buttons functions Microsoft Excel 2016

    Earlier in the post, we’ve discussed on the buttons of the Delete group. Now in this post, we’ll know further about the Fill buttons of the Editing group. This group is part of the Home tab ribbon. Also once, we explained about all the buttons of this group. But, at that time, it was just an overview of these buttons.

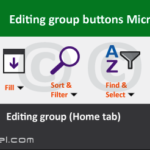
    So, the Editing group has total eight buttons. They are the Down button, the Right button and the Up button etc; and so on. Also’re the Left button and the Fill Across Worksheets button etc.

    In addition, the buttons are the Series button, the Justify button and the Flash Fill button. As the name indicates, the Fill buttons helps users to put or insert data in smart and effective ways.

    First of all, the Down button fills the data in the below cell; copying it from the cell just above it. The Shortcut Key for the Down button is “Ctrl+D“. In fact, this key combination shortcut is the most and frequently while working in Excel.

    Fill buttons description Microsoft Excel – continued

    Secondly, the Right button fills the data to the right side cell, copying the data from the left adjacent cell. The Shortcut Key for the Right button is “Ctrl+R”. But, this shortcut is not very often in use, because of the use of the shortcut keys “Ctrl+D”. Instead users prefer dragging, by using the Fill Handle or Copy Pasting the data.

    Thirdly, the Up button fills the data in the upward cell, copying the data from the cell below it. However, there’s a lengthy Shortcut Key for the Up button i.e. “Alt+H+FI+U”. Fourthly, the Left button fills the data in the left cell, copying the data from the right side cell. And, the Shortcut Key for the Left button is “Alt+H+FI+L”.

    Further, the Across Sheets helps to fill content across multiple sheets at once. For this, firstly users have to select more than single sheets. The Multiple sheets’re selected by using the Ctrl+Left Mouse button click while holding and pressing the Shift Key down. And, then click the Across Sheets button after the sheets are in selection.

    Fill buttons description of Editing group Excel 2016

    Then, the Series button helps to fill numbers across columns and rows. This button increases the number counter or decreases the number counter. Also, the Series button shows up the Series dialog box with multiple options.

    Furthermore, the Justify button put characters from multiple cells into a single cell; and also splits the single cell contents into multiple cells vice versa. Especially, the Justify button is a very handy one; and often gets overlook by the users at the initial stage while learning Excel.

    Lastly, the Flash Fill button is a new comer in this software program, from the Microsoft Excel 2013 version. So, this button is quite smart, when it comes to filling of the same data in adjacent columns.

    It doesn’t works for adjacent columns. The Flash Fill button put in the values automatically into the column cells; referring initially from a couple of examples of values from the above most cell.

    See Next Post: Clear buttons tools Alignment group Microsoft Excel 2016

  • Multiple ways to use Autosum buttons functions Excel 2016

    Several ways to use Autosum buttons functions Excel

    Using Autosum buttons functions Editing group MS Excel 2016
    Multiple ways use Autosum buttons functions Excel

    See Previous Post: Delete buttons tools Cells group Microsoft Excel 2016

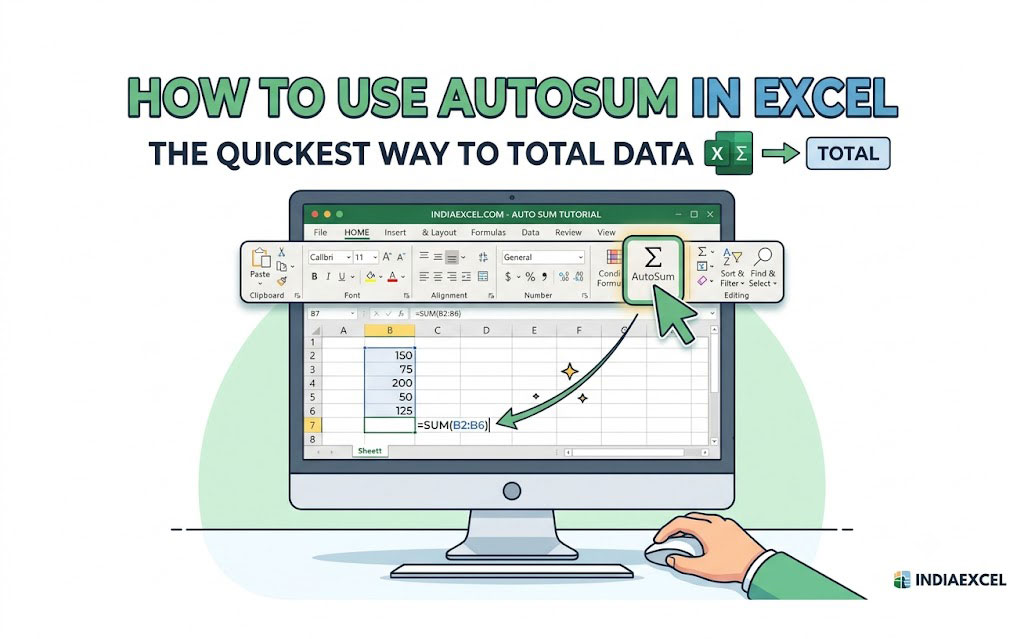
    The Autosum buttons functions are part of the Editing group. This group is present in the Home tab ribbon. And, in this post, we’re going to know furthermore about the buttons of this group. Also, an overview of all the buttons of this group was provided, in of the posts.

    In the first place, the Autosum is the first button of the Editing group. This group has six buttons in total. They’re the Sum function, the Average function and the Count Numbers function etc; and so on. Also the buttons’re the Max function, the Min function, the More Functions.

    Many ways to use Autosum buttons functions Excel – continued

    The functions helps in addition, subtraction, multiplication, division etc; in Microsoft Excel. Also, they’re helpful for counting numbers, finding averages. And, a lot more various and numerous functions are also present which helps in different calculations as well.

    Firstly, the Autosum function adds two or more than two numbers in cell. Secondly, the Average function helps to find out the average of the numbers. Thirdly, the Count Number functions helps to count the total numbers of the cells in selection.

    Fourthly, the Max function shows the largest number, in a range of selection of numbers. And, the Min function helps to display the lowest number, in a range of selection of numbers. Further, the More Functions button shows the Insert Function dialog box pop up.

    Multiple ways Autosum buttons functions Microsoft Excel

    The Autosum function button, both vertically or horizontally can be used. It means the function is usable for a column of numbers or a row of numbers. Also, a range of numbers could also be calculated by the helps of the Autosum function. By all these types, the Autosum button is capable of handling calculations; and will add the numbers in question.

    So, let us assume, we’ve to calculate a few numbers in a column. To calculate these, select all the numbers first and then click the Autosum button. The total gets shown at the bottom of the column. Almost similarly, initially select all the numbers in a row and click the Autosum button once or twice.

    Lastly, for a range of numbers, select them and click the Autosum button. Alternatively, users can press the Shortcut Key i.e. the “Alt+=” to use the Autosum function. This Autosum function is the most used of all the other functions.

    See Next Post: Fill buttons commands Editing group Microsoft Excel 2016

  • Delete buttons description of Cells group Microsoft Excel

    Delete buttons description Cells group MS Excel

    Delete buttons Cells group Home tab MS Excel
    Delete buttons Cells group Microsoft Excel 2016

    See Previous Post: Insert buttons tools Cells group Microsoft Excel 2016

    Previously, in the post, we’ve discussed about on the Delete buttons. Now, we’ll next explain deep about the Delete buttons. Also, these buttons are part of the Cells group of the Home tab. And, the key role of these buttons, as the topic of this post says, is to delete. Whether, it is the Row or the Column or the Cells in worksheet.

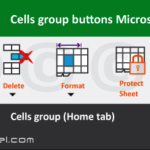
    Almost similarly like the Insert button, in sum, the Delete button has four buttons. So, they’re the Delete Cells and the Delete Sheet Rows buttons etc. Also, the rest are the Delete Sheet Columns and the Delete Sheet buttons. Significantly, already we know that, the buttons have their own Shortcut Keys.

    Delete buttons of Cells group Excel 2016 – continued

    Firstly, the Delete Cells button helps to delete new cells, rows, and the columns. And, these’re deleted from a table or in the worksheet. Above all, the selected Rows gets deleted by first selecting them. The Shortcut Key for this buttons is the “Ctrl+-” in MS Excel.

    Secondly, the Delete Sheet Rows button deletes new rows from the sheet. Most noteworthy, to delete more than a single row at once, first the rows shall be selected. For example, if we need to delete two rows, then we must select two rows.

    Thirdly, the Delete Sheet Columns buttons helps to delete new columns in the sheet. And, to delete multiple columns at once, more than one column should be selected. Especially, the “Ctrl+-” keys deletes the new Columns and the Rows.

    Delete tools of Cells group Microsoft Excel 2016

    Lastly, the Delete Sheet buttons deletes the currently selected sheet from the bottom. The sheet is deleted automatically from the sheet, that is already present in Microsoft Excel.

    So, the Shortcut Key of this button is “Alt+H+D+S“. Most of all, the deleting of the Rows, the Columns or the Cells’re most frequently done; in comparison to the insertion of these, while working.

    And, for deleting multiple sheets at once, hold and press the Shift key and then click the numbers sheets. By this way, more than single sheets’re selected and then deleted easily.

    Also, using the Ctrl key helps users to select multiple sheets; from in between, by clicking individually on the sheets for deleting.

    See Next Post: Multiple ways use Autosum buttons functions Microsoft Excel 2016

  • Insert buttons description of Cells group MS Excel

    Insert buttons description of Cells group Excel

    Insert buttons Cells group Home tab MS Excel
    Insert buttons Cells group Microsoft Excel 2016

    See Previous Post: Introduction Format Cells dialog box Microsoft Excel 2016

    Before proceeding, we must know that, the Insert buttons are part of the Cells group. And, this group is part of the Home tab. In addition, already we’ve explained about on the buttons of this group, in one of the post. But, now we’ll only keep an eye on the buttons of the topic of this post.

    So, the Insert button has four buttons in total. They’re the Insert Cells and the Insert Sheet Rows buttons etc. Also, the rest are the Insert Sheet Columns and the Insert Sheet buttons. Especially, all these buttons have their own Shortcut Keys.

    Insert buttons of Cells group Microsoft Excel – continued

    Firstly, the Insert Cells button helps to insert new cells, rows, and the columns. And, these’re inserted into a table or in worksheet. Above all, the new Rows’re inserted above the selected row. While, the new Columns’re added to the left side of the selected column. The Shortcut Key for this buttons is the “Ctrl+Shift+=“.

    Secondly, the Insert Sheet Rows button adds new rows in the sheet. Most noteworthy, to add more than a single at once, users will have to select the rows previously. Suppose, if we need to insert two new rows, then we must select two rows.

    Thirdly, the Insert Sheet Columns buttons helps to add new columns in the sheet. And, to insert multiple columns at once, equal number columns shall be selected. Most of all, the “Ctrl++” keys adds new Columns and Rows. But, before pressing these keys, selection of the Row or Column is must.

    Lastly, the Insert Sheet buttons adds new sheet at the bottom. The newly sheet automatically gets inserted to the Left side of the sheet, that is already present. And, the Shortcut Key of this button is “Shift+F11“. To emphasize, the “Ctrl++” shortcut keys add new Rows or Columns. And, the “Ctrl+-” keys deletes the Rows or the Columns.

    See Next Post: Delete buttons tools Cells group Microsoft Excel 2016

  • Introduction to the Format Cells dialog box Excel 2016

    Format Cells dialog box description MS Excel

    Format Cells dialog box Home tab MS Excel
    Format Cells dialog box Microsoft Excel 2016

    See Previous Post: Merge Center buttons Alignment group Microsoft Excel 2016

    In Microsoft Excel, the Format Cells Dialog Box plays a very important & vital role. Also, it has been in this software program from the earlier versions as well. The Home tab ribbon has Seven groups. They are the Clipboard group, Font group, and the Alignment group etc. Also, the rest others are the Number group, Styles group, Cells group and the Editing group.

    So, the second, third and the fourth groups of the Home tab have the Dialog box launcher buttons. And, they are located at the very bottom right side corner in each one of the groups.

    Also, the buttons are very small in size. Except the Clipboard group’s Dialog box launcher button; all other group’s show the associated tab related to the group in the Format Cells dialog box.

    Format Cells dialog box Microsoft Excel – continued

    It means, when each one of the group’s Dialog box launcher buttons’re clicked; they open the tabs which have the options related to that group only, in the Format-Cells dialog box. Firstly, as the Font group opens the Font Settings dialog box. And the Shortcut Key for this is (Ctrl+Shift+F).

    Secondly, the Alignment group launches Alignment Settings dialog box. And, no shortcut is assigned for this box. Thirdly, the Number group opens up the Number Format dialog box.

    So, apart from these, the other tabs of the Format-Cell dialog box are; the Border settings tab, the Fill settings tab and the Protection settings tab. The Number tab is the first tab.

    Format Cells dialog box Microsoft Excel 2016

    Then is the Alignment tab. Next is the Font tab. And, finally are the three tabs from the Border till the Protection tabs. Above all, the another important Shortcut Key for the Format Cells Dialog Box is the “Ctrl+1” keys.

    Most noteworthy, this “1” key also has the Exclamation Symbol “!” with it, above the letter “Q” key. Lastly, the Format Cells Dialog Box helps to solve the formatting, alignment and the font related tasks etc.

    See Next Post: Insert buttons tools Cells group Microsoft Excel 2016

  • Merge Center buttons of Alignment group MS Excel 2016

    Merge Center buttons of Home tab Excel 2016

    Merge Center buttons Home tab MS Excel 2016
    Merge Center buttons Alignment group Microsoft Excel

    See Previous Post: Orientation buttons tools Alignment group Microsoft Excel 2016

    In the first place, we’ve already discussed about the Alignment group. This group is part of the Home tab ribbon. All the buttons of this group was explained, in one of our posts. But, it was an overview of the Merge Center buttons. Hence, now in this post, we’ll further discuss only about on these buttons.

    In the previous, all the Orientation buttons were part of the discussion. Some of they’re Angle Counterclockwise and the Angle Clockwise buttons etc; and so on. In total, the Alignment group has Eleven buttons. They’re the Align, the Wrap Text, the Indent buttons etc.

    So, the Merge Center button has four buttons including itself. These are the Merge Across, the Merge Cells and the Unmerge Cells. Firstly, the Merge Center button helps to join cells together by making it as a single cell. Obviously, the new single cell is large in size, due to the combination of the multiple cells. Also, the contents of the cell get centered in the large cell i.e. in the middle.

    Merge Center buttons of Microsoft Excel – continued

    Secondly, the Merge Across button merges the selected cells in the same row. And, the cell becomes large as well due to joining of the cells. But, unlike the Merge Center, the Merge Across doesn’t centers the content after merging. So, if multiple cells have values, the first left cell’s value remains, while the others’re deleted due to the merge.

    Thirdly, the Merge Cells button helps to merge the selected cells into one individual cell. Also, like the Merge Center, this button does not center the contents too, after the merging of the cells. And, similarly the first left cell’s values’re remained,  after the merging process at last, out of the other ones.

    Lastly, the Unmerge Cell button splits the newly formed large cell single cell to multiple cells. It means all the cells participated in the merging process, retain their positions. But, only the values of the left single cell gets left, and the others aren’t.

    See Next Post: Introduction Format Cells dialog box Microsoft Excel 2016